Windows CLI Basics (TryHackMe)
Windows CLI Basics is a beginner-friendly TryHackMe room if you’re getting started with Operating Systems, i.e., Windows, or even if you’re used to navigating other OS like linux or Unix used in Mac this room help you understand some basic command-line concepts.
Introduction
In the previous Linux CLI Basics room, you took your first steps into the Linux command line. Today, you're continuing your journey, but this time on Windows. Windows is one of the most widely used operating systems in workplaces worldwide. As someone interested in cyber security, you will often investigate or troubleshoot Windows machines, especially user desktops and laptops.
In this room, you'll learn how to use the Windows Command Prompt to navigate files, search for information, and gather basic system details using the same hands-on, story-driven approach as before.
From a security perspective, Windows is important because many real-world attacks and investigations involve Windows systems.
What Is the Windows Command Line?
The Command Prompt (often referred to as CMD) is a text-based interface for interacting with the Windows operating system. Instead of clicking folders and menus, you type commands to tell the system exactly what you want to do, such as listing files, moving between folders, or checking system information. It might look simple, but it's a powerful and widely used tool.
Learning Objectives
By the end of this room, you will be able to:
Use the Windows command line confidently
Navigate folders without clicking
Find files when you only know their name
Read files using the terminal
Collect basic system and network information
Prerequisites
This room expects you to have explored the following rooms to understand better:
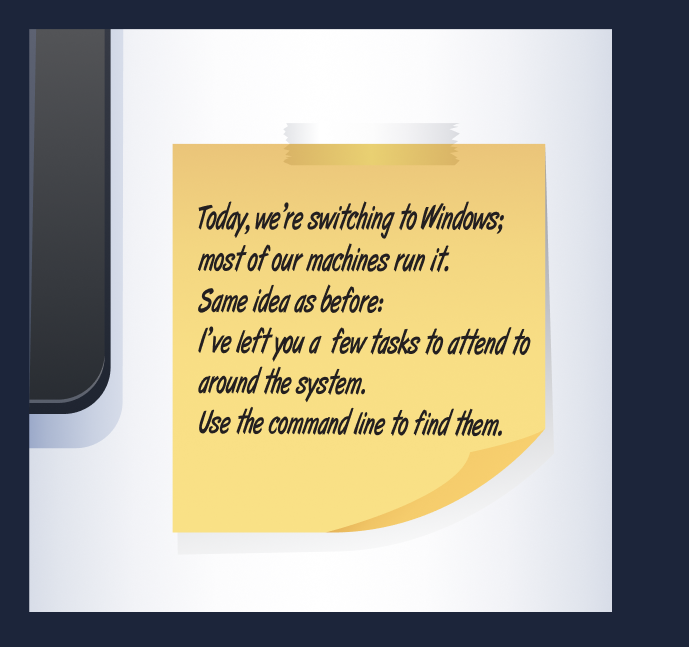
Storyline: Day 2 on the Job
You arrive for the second day of your internship. Your supervisor greets you with a quick update:
So here you are on your own for now, faced with a terminal prompt and a bit of mystery. Don't worry, though. Each step in this room will guide you through exactly what to do. You'll learn how to move around the system, read files, and gather information - the same basic skills that cyber security professionals use every day.
Windows CLI: Navigating Files and Finding Your First File
A Quick Recap About the Terminal
Before we begin exploring, let's take a moment to familiarize ourselves with the tool we're using.
The terminal is a text-based interface for interacting with the Windows OS. Instead of clicking windows and folders, you type commands that tell the computer exactly what to do. cyber security professionals use it because:
It's faster than clicking around
It gives more control
Many security tools only run in the terminal
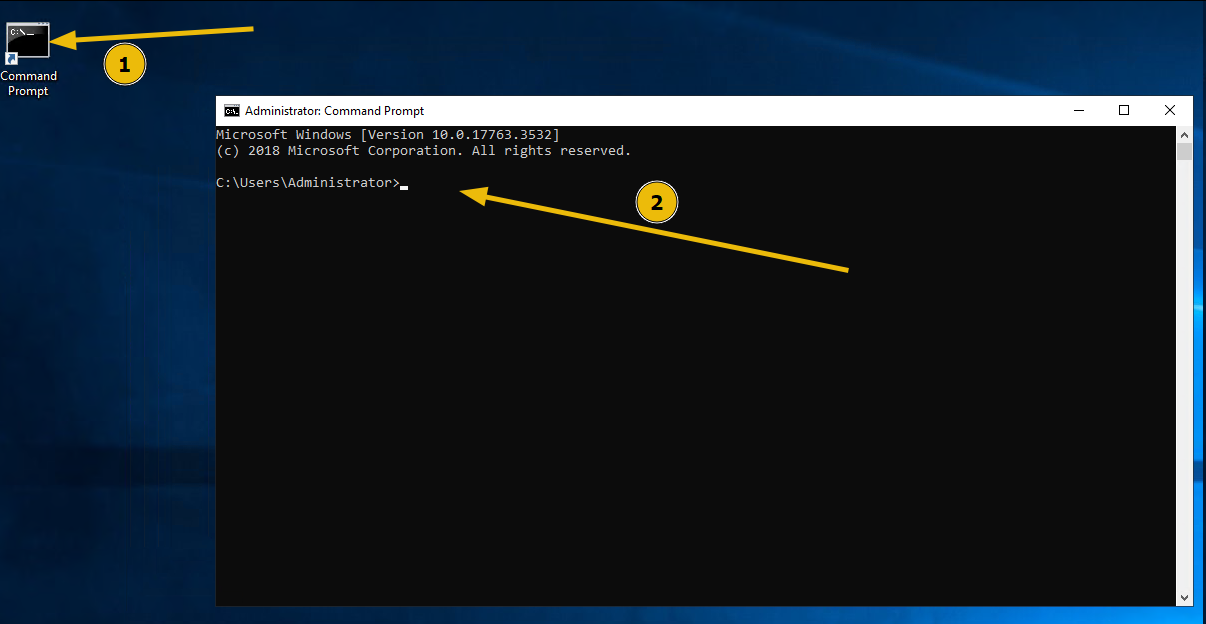
By the end of this room, it will feel far more comfortable, and you'll see it as a straightforward tool rather than something intimidating. Click on the Terminal file present on the Desktop:
Overview
Before you can explore anything on a Windows system, you need to know how to move around and look for files using the command line. In this task, you'll learn how to explore folders, move between directories, search for a file when you don't know where it is, and read the contents of a text file, all using Command Prompt.
These are the same kinds of skills you'll use later when troubleshooting systems.
Task: Find the mission_brief.txt file
Your boss has left you another note, with a task to find the task_brief.txt file:

"I've left a file called task_brief.txt somewhere in your user folder.
You'll need to find it using the command line and read what it says."
You're only given the name of the file, not its location.
Let's explore how to navigate through the Windows filesystem using the command line and how to locate a file without knowing its actual location.
Step 1: Where Am I?
Before doing anything else, open the terminal on the Desktop, and check your current location by typing the command cd, as shown below:
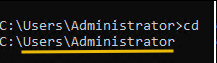
This shows the full path of the directory you're currently in. On Windows, this is usually your user folder. Please note that the cd command is also used to change the directory, which we will use later in the task.
Step 2: What's Around Me?
Now, list the contents of the current directory using the command: dir
This command will list down the files and the folders present in the current directory, as shown below:
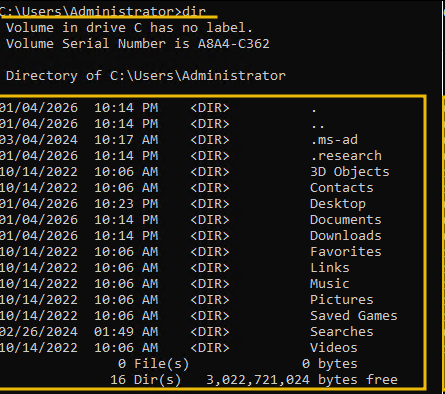
You'll see files and folders that are visible by default. Take a moment to look around; not everything you need will always be obvious. From the output, we can see that the command has returned 16 directories.
Step 3: Are There Hidden Files?
Some files and folders on Windows are marked as hidden, which means they don't appear in a normal listing. To show everything, including hidden items, run: dir /a
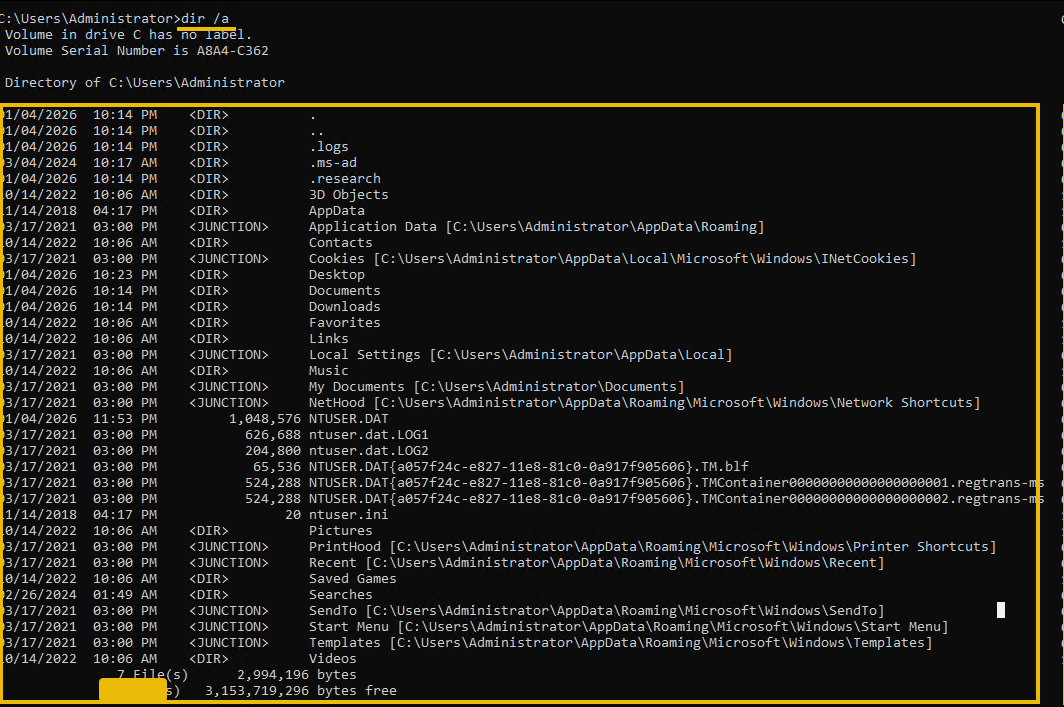
The output clearly indicates that more than 12 hidden folders were found. It is important to note that hidden doesn't mean secret; it just means Windows hides them by default.
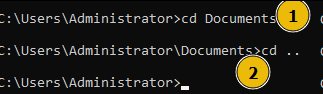
Step 4: Moving Around the Filesystem
Let's use the cd command to navigate through the folders. We can use the format cd folder_name to move to the specified folder. The command cd Documents will move us to the Documents folder, as shown below. To move back one level, we can use the cd command.
To become familiar with the environment, use the dir or dir /a command to move to see what's inside each folder. You can explore a few folders to get comfortable, but the file you're looking for probably isn't in an obvious place.
Step 5: Finding the File on the Disk
Instead of guessing where the file is, let Windows search for it. Use the following command: dir /s task_brief.txt. The /s flag tells Windows to search all subfolders starting from your current directory and show you the full path if the file exists.
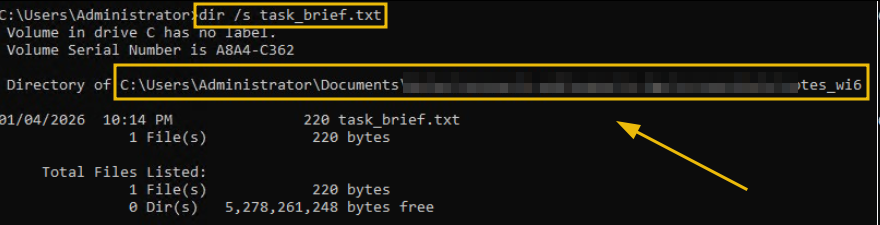
As we can see, the command above helped us locate the file and provided its full path. Take note of the path shown in the output.
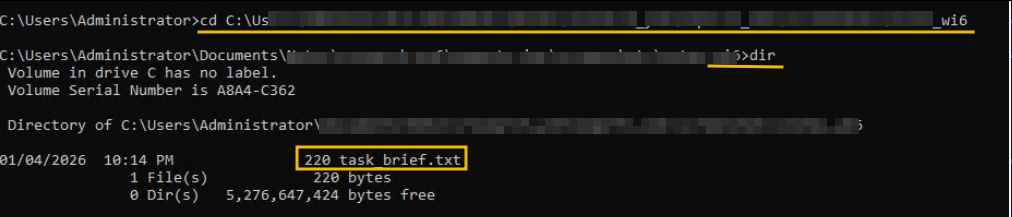
Step 6: Navigate to the File
Now that we know where the file is located, let's use the cd command to navigate to the folder using the command format cd <path_to_the task_brief.txt>. Use dir again to confirm that task_brief.txt is in the folder, as shown below:
Step 7: Read the File
Now read the contents of the file using: type task_brief.txt. This will print the contents of the file directly in the command prompt, as shown below:

Perfect.
You have not only learned how to navigate Windows directories using the CLI, but also how to find files and read their contents.
The content of task_brief.txt leads us to our next task: inquiring about the system we are currently using. Let's explore that in the next task.
Answer the questions below
What is the full path of the task_brief.txt found on the system?
cd Documentsdir /adir /s task_brief.txt
cd REDACTED_PATHtype task_brief.txt
What message and flag are written inside task_brief.txt?
Gathering System Information on Windows
Overview
Now that you know how to move around and find files using the Windows command line, it’s time to learn how to ask the system questions about itself. cyber security and IT professionals do this all the time. Before fixing a problem or investigating an incident, they first want to know:
Who am I logged in as?
What machine is this?
What version of Windows is it running?
How is it connected to the network?

In this task, you'll learn how to gather that information step by step.
Step 1: Who Am I Logged In As?
When working on a system, one of the first things to check is which user account you’re using. This matters because different users can have different permissions.
Run the following command:whoami. This command prints the username of the account you’re currently logged into.

Step 2: What Is the Name of This Computer?
Every Windows machine has a name. In workplaces, this helps identify network systems. To see the computer’s name, run: hostname.
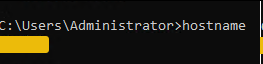
You’ll see a short name printed in the terminal.
Step 3: What Version of Windows Is This?
Next, let’s look at details about the operating system itself. Run:systeminfo
This command prints a lot of information. Don’t worry, you’re not expected to understand everything yet.
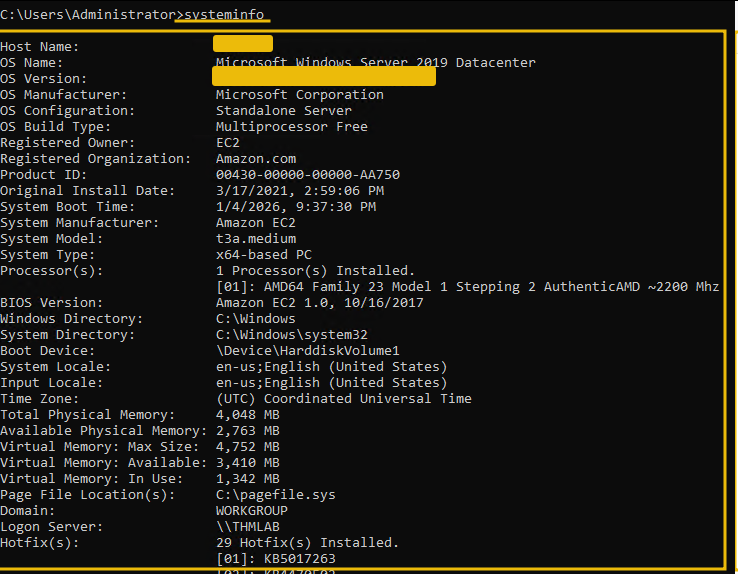
Focus on these parts:
OS Name
OS Version
System Type
These details indicate the version of Windows the machine is running and whether it’s 32-bit or 64-bit.
Step 4: How Is This Machine Connected to the Network?
Finally, let’s look at basic network information. Run: ipconfig
This shows the machine's network configuration.
Look for:
An IPv4 Address
A Default Gateway
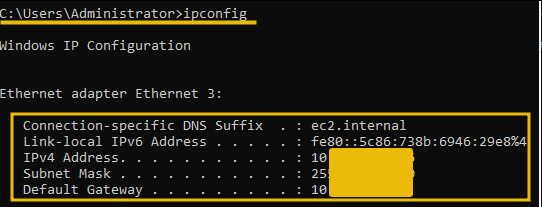
This information helps analysts understand how a machine connects to the network.
Summary
In this task, you learned how to ask a Windows system simple but important questions using the command line.
You practiced:
Identifying who you are logged in as
Finding the name of the computer
Checking Windows version and system details
Viewing basic network information
These are some of the first commands analysts and IT staff run when they start working on a Windows machine.
Answer the questions below
- What is the computer name shown by hostname?#
whoami
hostname

- What Windows version is listed in the systeminfo output?
systeminfo
Conclusion
Overview
You’ve reached the end of this room - nice work.
In this room, we learned how to interact with a Windows system using the command line instead of relying on the graphical interface. This task is a short wrap-up to reflect on what you’ve learned and why it’s important.
What You Learned
In this room, you practiced using the Windows Command Prompt to:
Navigate files and folders without clicking
Locate files even when you didn’t know where they were
Reveal hidden files and directories
Read file contents directly from the terminal
Gather basic system and network information
These are foundational skills that apply across many roles in IT and cybersecurity.
Why This Matters
In real-world environments:
Not everything is visible in the graphical interface
Files may be hidden or buried deep in the system
Analysts often need quick answers without clicking through menus
Command-line tools are faster, more precise, and easier to automate
Being comfortable with the Windows command line gives you more control and better visibility into a system.