Linux CLI Basics (TryHackMe)
Linux CLI Basics is a beginner-friendly room on TryHackMe for someone getting started with Operating Systems fundamentals. It helps you understand how to use basic Linux CLI, like navigating files, reading files, etc.
Introduction
In cyber security, Linux is everywhere, powering servers, security tools, and even hacking environments. However, before you can defend systems or investigate incidents, you need to know how to navigate the Linux OS using the command-line interface (CLI). This room takes you on a guided mission as a brand-new intern in a cyber security team. We will explore the absolute basics of Linux CLI through hands-on tasks, simple missions, and beginner-friendly explanations.
By the end of this task, you'll understand what the terminal is, why it matters, and how you'll use it throughout the room.
Learning Objectives
Understand what the Linux terminal is and what it's used for.
Feel comfortable interacting with the Linux environment.
Navigate through the Linux filesystem with basic commands.
Prerequisites
Storyline: Your First Day on the Job
Congratulations, today is your first day as an IT Support Engineer with the Cyber Operations Support Team. You were supposed to get a proper introduction and a tour of the tools you'll be using, but things in this field don't always go as planned.
Your supervisor left in a hurry to deal with an urgent incident. Before they ran out the door, they left you a short note on your desk:

So here you are on your own for now, faced with a terminal prompt and a bit of mystery. Don't worry, though. Each step in this room will guide you through exactly what to do. You'll learn how to move around the system, read files, and gather information - the same basic skills that cyber security professionals use every day.
Ready to begin?
Answer the questions below
- What does "CLI" stand for?
Navigation Mission: "Find the Missing Notes"
A Quick Note About the Terminal
Before we begin exploring, let's take a moment to familiarize ourselves with the tool we're using.
The terminal is a text-based interface for controlling a Linux system. Instead of interacting with the graphical interface, you type commands that tell the computer exactly what to do. Cyber security professionals use it because:
It's faster than clicking around
It gives more control
Many security tools only run in the terminal
If the terminal feels unfamiliar at the moment, that's completely normal.
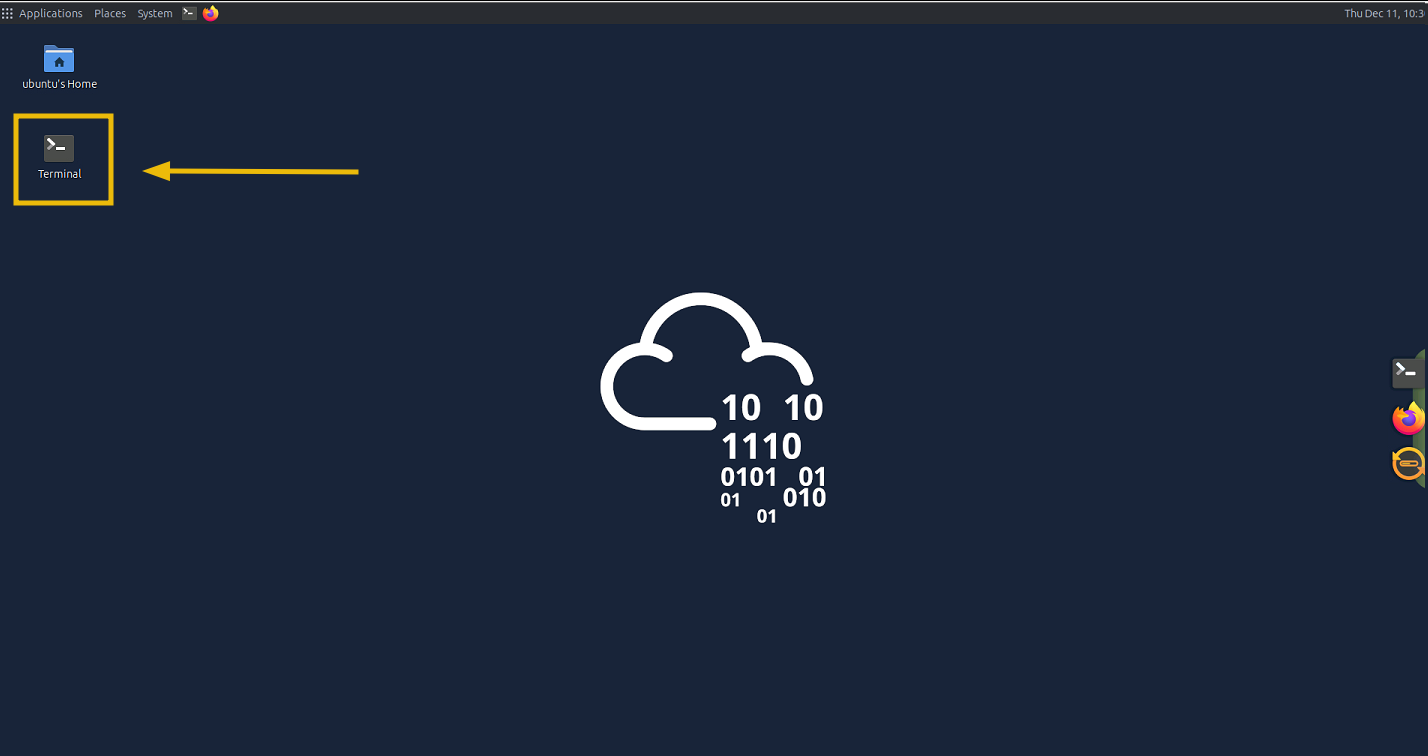
By the end of this room, it will feel far more comfortable, and you'll see it as a straightforward tool rather than something intimidating. Double-click on the Terminal file present on the Desktop, as shown below:
Interacting With the Terminal
Now that you know what the terminal is, it's time to start using it.
Your supervisor mentioned leaving a few tasks in the document mission_brief.txt, somewhere on the system; which means your first mission is to find them. To do that, you'll need to learn how to move around the Linux filesystem.
This task will introduce the core navigation commands that every Linux user learns on their first day.
Step 1: "Where Am I?"
When you first open a terminal, you might not know what part of the system you're in.
Use this command to find out: pwd
PWD Command
ubuntu@tryhackme:~$ pwd
/home/ubuntu
It stands for "print working directory", which basically means "show me the folder I'm currently in".
Step 2: "What's Around Me?"
Now that you know where you are, let's see what files and folders are here: ls
ls Command
ubuntu@tryhackme:~$ ls
Desktop    Downloads  Pictures  Templates  logs
Documents  Music      Public    Videos     projects
This lists the content of the current directory. If we need more details, we can try: ls -l
ls -l Command
ubuntu@tryhackme:~$ ls -l
total 44
drwxr-xr-x 2 ubuntu ubuntu 4096 Feb 27  2022 Desktop
drwxr-xr-x 6 ubuntu ubuntu 4096 Dec 11 12:45 Documents
drwxr-xr-x 2 ubuntu ubuntu 4096 Feb 16  2024 Downloads
drwxr-xr-x 2 ubuntu ubuntu 4096 Feb 27  2022 Music
drwxr-xr-x 2 ubuntu ubuntu 4096 Feb 27  2022 Pictures
drwxr-xr-x 2 ubuntu ubuntu 4096 Feb 27  2022 Public
drwxr-xr-x 2 ubuntu ubuntu 4096 Feb 27  2022 Templates
drwxr-xr-x 2 ubuntu ubuntu 4096 Feb 27  2022 Videos
drwxr-xr-x 4 ubuntu ubuntu 4096 Dec 11 12:29 logs
drwxr-xr-x 5 ubuntu ubuntu 4096 Dec 11 12:29 projects
drwx------ 3 ubuntu ubuntu 4096 Sep 12  2024 snap
The output displays important information about the files and directories like file sizes, permissions, dates, and more.
Hidden Files
In order to get the hidden files in the directory, we can append the command to ls -al, and it will display all the hidden files present in the directory, as shown below:
ls -al Command
ubuntu@tryhackme:~$ ls -al
total 144
drwxr-xr-x 24 ubuntu ubuntu  4096 Feb 10 10:48 .
drwxr-xr-x  3 root   root    4096 Feb 10 10:36 ..
-rw-------  1 ubuntu ubuntu   439 Feb 10 06:47 .Xauthority
-rw-rw-r--  1 ubuntu ubuntu     0 Sep 12  2024 .Xresources
-rw-r--r--  1 ubuntu ubuntu   111 Oct  3  2024 .apport-ignore.xml
----------
--------------------
drwxr-xr-x  2 ubuntu ubuntu  4096 Feb 27  2022 Templates
drwxr-xr-x  2 ubuntu ubuntu  4096 Feb 27  2022 Videos
drwxr-xr-x  4 ubuntu ubuntu  4096 Dec 11 12:29 logs
drwxr-xr-x  5 ubuntu ubuntu  4096 Dec 11 12:29 projects
drwx------  3 ubuntu ubuntu  4096 Sep 12  2024 snap
Hidden files aren't really secret; they start with a dot ., and Linux hides such files by default.
Step 3: Let’s Move Around
To walk through the filesystem, we can use: cd <directory>. For example: cd Documents, and this will change our directory to Documents, as shown below
cd Command
ubuntu@tryhackme:~$ cd Documents/
ubuntu@tryhackme:~/Documents$ pwd
/home/ubuntu/Documents
To go "back" one level, we will use the command cd .., as shown below:
cdCommand
ubuntu@tryhackme:~/Documents$ cd ..
ubuntu@tryhackme:~$ pwd
/home/ubuntu
Step 4: Learn the Power of "Find"
Let's now use one of the handy tools to find. As the name suggests, this built-in utility is used to locate files within the file system. Here's a simple version of the command: find <starting_point> -name <filename>. Since your supervisor mentioned that the file mission_brief.txt resides somewhere in your home directory, begin the home directory symbol: ~. So we will run the command: find ~ -name mission_brief.txt, as shown below:
find Command
ubuntu@tryhackme:~$ find ~ -name mission_brief.txt
/<REDACTED-PATH>/mission_brief.txt
Please note that this may take a moment, as Linux will check every folder inside your home directory. If the file exists, Linux will print the full path to it. The above result shows that the command has successfully located the file and provided us with its complete path, allowing us to navigate and read the file's content.
Let's use the cd command to navigate to the folder. We can also do ls to confirm the presence of the file, as shown below:
cd Command
ubuntu@tryhackme:~$ cd /<REDACTED-PATH>/
ubuntu@tryhackme:~/<REDACTED-PATH>$ ls
mission_brief.txt
Step 5: Read the File
Another useful utility is cat. This is used to read the content of the file. To read this file, we will run the command cat mission_brief.txt to get the content, as shown below:
cat Command
ubuntu@tryhackme:~/<REDACTED-PATH>$ cat mission_brief.txt
Great job finding your way around the terminal.

Your next assignment is to collect a small system report:
- Who you're logged in as
- The kernel version
- Total disk space
- The name of this Linux distribution

Once you gather those details, you'll be ready for the next step.

FLAG:<REDACTED>
Perfect. This is great progress. You have completed the task.
After answering the questions, let's proceed to the next task and learn how to retrieve system information using the commands in the CLI.
Answer the questions below
What is the full path of the mission_brief.txt file found on the system using the find command?
find ~ -name mission_brief.txt
What is the flag hidden inside the mission_brief.txt file?
Investigating the System
Now your supervisor wants you to gather some basic information about the system you’re working on. This kind of information helps cyber security teams understand what environment they’re operating in, what version of Linux they’re using, and what resources are available.
Think of this as taking a quick health check of the machine.
Your Next Assignment
When you opened mission_brief.txt, it contained a new message:
Great job finding your way around the terminal. Your next assignment is to collect a small system report:
Who you're logged in as
The kernel version
Total disk space
The name of this Linux distribution
You’re still on your own for now, but at least the instructions are clear: collect system info and send it back. Let’s break the job into small steps.
Step 1: "Who Are You Logged in As?"
The simplest command in Linux also happens to be one of the most useful: whoami
whoami Command
ubuntu@tryhackme:~$ whoami
ubuntu
This prints your current username.
Step 2: "What System Are You On?"
To see details about the operating system, kernel version, and architecture, use: uname -a
uname -a Command
ubuntu@tryhackme:~$ uname -a
Linux tryhackme <REDACTED>-aws #17-Ubuntu SMP Mon Sep  2 13:48:07 UTC 2024 x86_64 x86_64 x86_64 GNU/Linux
This gives a full line of system information - great for understanding exactly what environment you're working in.
Breakdown of the Information
Linux: The system is running the Linux kernel.
tryhackme: The hostname (the computer’s name).
<REDACTED>-aws: The kernel version installed on the machine.
x86_64: The hardware platform (also 64-bit).
GNU/Linux: The operating system type (Linux kernel + GNU tools).
If you only want the operating system name, you can try: uname
uname Command
ubuntu@tryhackme:~$ uname
Linux
But for now, uname -a gives the fuller picture.
Step 3: Check Disk and Storage Info
In real-world environments, you’ll often need to check disk usage or available space, especially before running tools or analyzing logs. A simple command for readable output is: df -h
df -h Command
ubuntu@tryhackme:~$ df -h
Filesystem      Size  Used Avail Use% Mounted on
/dev/root        --G   12G   --G  17% /
tmpfs           1.9G     0  1.9G   0% /dev/shm
tmpfs           774M  1.2M  773M   1% /run
tmpfs           5.0M     0  5.0M   0% /run/lock
tmpfs           387M  192K  387M   1% /run/user/1000
tmpfs           387M  172K  387M   1% /run/user/114
The -h means "human readable"; it shows sizes like 2G or 500M instead of long bytes-only numbers.
Breakdown of the Information
/dev/rootis the main disk of the system with --G total, 12G used, <REDACTED>G free, and is 17% full.tmpfsentries are temporary filesystems stored in RAM, not on the physical disk./dev/shmis a shared memory area with 1.9G available and 0 used./run/user/114is similar temporary storage for another system user, also 387M total and mostly empty.
Step 4: Read a System File
Linux stores configuration and informational files in the /etc directory.
To practice navigating and reading files, head into /etc by running cd /etc and then list what’s inside: ls
cd Command
ubuntu@tryhackme:~$ cd /etc
ubuntu@tryhackme:/etc$ ls
ImageMagick-6                  cloud                 firefox               hp               logcheck              opt                     rmt                sysctl.d
ModemManager                   compizconfig          fonts                 ifplugd          login.defs            os-release              rpc                sysstat
NetworkManager                 console-setup         fstab                 init             logrotate.conf        overlayroot.conf        rsyslog.conf       systemd
---
-------
chatscripts                    ethertypes            hosts.deny            localtime        openvpn               resolv.conf             sysctl.conf
ubuntu@tryhackme:/etc$
Let’s now use cat to read the os-release file that almost every Linux system contains: cat os-release, as shown below:
cat Command
ubuntu@tryhackme:/etc$ cat os-release
PRETTY_NAME="Ubuntu 24.04.1 LTS"
NAME="Ubuntu"
VERSION_ID="24.04"
VERSION="24.04.1 LTS (Noble Numbat)"
VERSION_CODENAME=noble
ID=ubuntu
ID_LIKE=debian
HOME_URL="https://www.ubuntu.com/"
SUPPORT_URL="https://help.ubuntu.com/"
BUG_REPORT_URL="https://bugs.launchpad.net/ubuntu/"
PRIVACY_POLICY_URL="https://www.ubuntu.com/legal/terms-and-policies/privacy-policy"
UBUNTU_CODENAME=noble
LOGO=ubuntu-logo
This file provides details about the Linux distribution that are often clearer than those provided by the uname command.
Great work. With just a few commands, we were able to retrieve the system information as requested by the supervisor.
Wrapping Up Your First Day
You’ve navigated the filesystem, searched for hidden files, and gathered system information, solid progress for your first steps into Linux. Before you finish your day, your supervisor has left one final task to test everything you’ve learned so far.
Nothing too hard, just a quick check to make sure you can put the basics together on your own.
Mini Challenge
You only know the name of the file: day1_report.txt
Your job:
Use the
findcommand to locate it somewhere in your home directory.Navigate to the folder where it was found.
Read the file contents using
cat.Use it for the the last question in this task.
No step-by-step instructions this time. You’ve earned the confidence to do this on your own.
Answer the questions below
What is the username returned by the
whoamicommand?whoami
uname -a
df -h
What is the kernel version shown by
uname -a?How much free disk space does
df -hreport?What is the message written inside
day1_report.txt?find / -type f -name day1_report.txt 2>/dev/null
Conclusion
And that’s your first day on the Cyber Operations Support Team.
You learned how to:
Navigate the Linux filesystem
Search for files
Inspect system information
Read important configuration files
Follow clues and complete missions inside a Linux environment
These skills may seem simple, but they’re the building blocks for everything that comes later: file permissions, users & groups, processes, package management, and eventually real security tooling.
You’re off to a strong start.